How Lab Notebook Scanning Preserves Annotations & Markings?

How Lab Notebook Scanning Preserves Annotations & Markings?

What Happens When You Lose Important Handwritten Notes? Laboratory notebooks are more than just scientific records—they contain critical annotations, markings, and handwritten notes that capture real-time observations, experiment conditions, and insights that may not be present in typed documentation. However, during lab notebook scanning, improper digitization can lead to lost annotations, faded markings, or unclear handwritten notes, affecting research integrity and compliance.

Why Preserving Annotations Matters in Lab Notebook Scanning?

  • Annotations provide context – Scientists jot down quick calculations, unexpected results, and key observations.
  • Handwritten notes record real-time insights – These may never be transferred to formal reports.
  • Markings highlight key findings – Symbols, underlines, and marginal notes guide future research.
  • Preserving handwriting ensures research authenticity – Maintaining an unaltered, accurate digital version is crucial for patents, compliance, and reproducibility.

How This Guide Helps?

This article explains:

  • Why annotations and markings are vital for research accuracy.
  • Challenges labs face when scanning notebooks with handwritten content.
  • The best technologies and practices for preserving these critical details.
  • How to choose the right professional scanning service for research records.

If your lab relies on handwritten notes, preserving them during scanning is non-negotiable! Let’s explore how to do it right.

The Importance of Annotations and Markings in Lab Notebooks

Why Are Annotations and Markings Critical in Research Notebooks? Lab notebooks are scientific evidence—they document experiments, observations, and hypotheses in real time. Beyond structured entries, annotations, marginal notes, and markings capture spontaneous insights, procedural adjustments, and key findings that might never make it into official reports. Losing these details during lab notebook scanning can result in gaps in research continuity, errors in replication, and challenges in intellectual property claims.

1. The Role of Annotations in Lab Research

Annotations serve as cognitive footprints, allowing scientists to refine experiments, highlight discrepancies, and document deviations from planned methodologies.

Key Functions of Annotations in Lab Notebooks:

  • Real-time Experiment Adjustments – Scientists modify protocols based on observed reactions.
  • Calculations & Corrections – Handwritten equations and unit conversions refine data accuracy.
  • Observational Notes – Color changes, temperature fluctuations, or unexpected reactions get documented.
  • Cross-Referencing – Links to previous experiments or journal references aid future research.
  • Team Collaboration – Multiple researchers annotate results, making teamwork more efficient.

Example: A chemical engineering team working on polymer synthesis notes an unexpected viscosity shift at 78°C and manually annotates this in the margin. If lost during scanning, the insight is erased, impacting further experiments.

2. The Impact of Losing Annotations During Scanning

When handwritten notes, underlined results, or marginal comments fail to appear in digitized lab notebooks, research suffers in multiple ways:

  • Loss of Critical Experimental Insights – Important discoveries may go undocumented.
  • Compromised Research Reproducibility – Future teams cannot replicate exact procedures.
  • Intellectual Property & Patent Risks – Handwritten timestamps and signatures authenticate invention timelines.
  • Regulatory Compliance Issues – Missing documentation can lead to non-compliance with FDA, GLP, or ISO standards.

Example: A biotech startup filing a patent must prove the first recorded occurrence of an experiment. If marginal annotations—documenting the initial discovery date—are not retained during scanning, legal challenges may arise.

Why Accurate Annotation Retention is Non-Negotiable?

  • Ensures that no scientific detail is lost
  • Protects intellectual property and legal claims
  • Maintains compliance with research and industry standards
  • Facilitates collaboration and research continuity

Next, we’ll explore the challenges labs face when trying to preserve handwritten notes and markings during scanning.

Challenges in Retaining Annotations and Markings During Scanning

Why Do Some Annotations Disappear During Lab Notebook Scanning? Scanning lab notebooks isn’t just about digitizing text—it involves preserving handwritten notes, margin annotations, faded ink, and scientific symbols without losing detail. Many labs struggle with scanning errors that result in missing or unreadable annotations, leading to gaps in research documentation.

Let’s explore the biggest challenges in preserving handwritten records, margin notes, and aged paper markings—and why standard scanning methods often fail.

Challenge Why It Happens Solution
✍️ Handwritten Notes: The Risk of Faded or Unreadable Text 🔹 Light pencil or faded ink may not be recognized by scanners.
🔹 Fast, informal handwriting can be blurry or illegible in digitized formats.
🔹 Traditional OCR struggles with complex scientific notations, Greek symbols, and formulas.
✅ Use high-contrast scanning modes.
✅ Implement AI-powered OCR capable of detecting handwritten text.
📜 Damaged or Aged Notebooks: Preserving Fragile Pages 🔹 Yellowed, brittle pages absorb light unevenly, causing contrast issues.
🔹 Ink bleeding through pages results in double-image distortions.
🔹 Torn or folded pages block handwritten text, leading to missing information.
✅ Use specialized archival scanning techniques.
✅ Adjust lighting and apply grayscale enhancement for better readability.
📝 Annotations in Margins: Risk of Being Cropped or Ignored 🔹 Scanning software often focuses only on the central text, ignoring margins.
🔹 Annotations close to the page edge may be cut off by automated alignment.
🔹 Light ink or small handwriting may not be detected in margin areas.
✅ Use full-page high-resolution scanning.
✅ Adjust settings to capture edge content without cropping.


Why These Challenges Matter in Research Documentation?

  • Missing handwritten data compromises research reproducibility.
  • Loss of faded ink, margin notes, or scientific symbols weakens legal and intellectual property claims.
  • Regulatory non-compliance risks increase if digital records are incomplete.

Next, we’ll explore the advanced scanning technologies that help preserve annotations and markings accurately.

Technologies That Help Preserve Annotations and Markings

How Can Advanced Scanning Technologies Retain Handwritten Notes & Annotations? Traditional scanning methods often fail to capture faded ink, margin notes, and handwritten calculations, leading to lost research data. To preserve every detail of lab notebooks—including delicate annotations and markings—labs must use advanced scanning technologies designed for scientific documentation.

Here are the key scanning technologies that ensure accurate retention of all handwritten details.

1. High-Resolution Scanning: Capturing Every Detail

What It Does:

  • Uses ultra-high DPI (dots per inch) settings (600–1200 DPI) to capture fine handwriting, faded ink, and intricate markings.
  • Ensures sharp contrast for pencil notes and light ink annotations.
  • Reduces blurring or pixelation in scientific diagrams and marginal notes.

Best For: Research notebooks with fine-pen, pencil, or lightly marked annotations.

2. Optical Character Recognition (OCR) for Handwritten Notes

What It Does:

  • Uses AI-powered OCR to recognize and digitize handwritten text and scientific symbols.
  • Converts handwritten notes into searchable, indexed digital files.
  • Detects Greek letters, chemical formulas, and mathematical equations often used in scientific research.

Best For: Labs needing searchable and indexed digital records of handwritten content.

3. Multi-Spectral & Contrast-Enhancing Scanners

What It Does:

  • Uses infrared and ultraviolet light to reveal faded or obscured text.
  • Enhances contrast in aged or damaged notebooks to restore legibility.
  • Prevents loss of marginal notes, light pencil markings, and annotations on degraded paper.

Best For: Archival and long-term research documentation where faded text must be restored.

4. Edge Detection & Full-Page Capture for Margin Annotations

What It Does:

  • Prevents margin cropping, ensuring handwritten notes outside main text areas are preserved.
  • Uses AI-driven alignment correction to capture text close to the edges of pages.
  • Eliminates scanner software auto-cropping that trims out handwritten notes in margins.

Best For: Labs with scientists who write critical notes in margins or page corners.

Why Investing in Advanced Scanning Technologies Matters?

  • Ensures all handwritten research data is retained, preventing loss of critical insights.
  • Enables accurate searchability with OCR and AI indexing for scientific notes.
  • Meets compliance and legal documentation standards for patent protection and audits.
  • Improves data integrity for long-term scientific archiving and knowledge preservation.

Next, we’ll explore the best practices labs should follow to maximize annotation retention during scanning.

Best Practices for Preserving Annotations During Scanning

How Can Labs Ensure Every Handwritten Note is Retained? Even with advanced scanning technology, improper setup or handling can result in blurred text, missing margin notes, or faded ink loss. To maximize accuracy, readability, and compliance, labs must follow best practices when digitizing handwritten lab notebooks.

1. Choosing the Right Equipment: High-Resolution & AI-Powered Scanners

Why It Matters:

  • Standard office scanners lack the precision needed for detailed lab notebooks.
  • High-resolution 600–1200 DPI scanning ensures fine details are captured clearly.
  • AI-powered OCR scanners detect handwritten notes, including chemical symbols and formulas.

Best Practice: Always opt for scientific-grade or archival-quality scanners that capture fine ink strokes, light pencil annotations, and scientific diagrams.

2. Pre-Scanning Preparation: Handling Notebooks Properly

Why It Matters:

  • Flatten notebook pages to prevent shadows and distortions.
  • Clean fragile pages carefully to remove dust or ink smudges that interfere with scanning.
  • Check for ink fading—if text is too light, consider pre-enhancing it for readability.

Best Practice: Handle old or fragile lab notebooks with care to prevent ink loss or page degradation during scanning.

3. Setting Optimal Scanning Parameters: Ensuring Maximum Clarity

Why It Matters:

  • Use grayscale mode to enhance faded annotations while preserving contrast.
  • Enable edge detection to prevent cropping out margin notes or handwritten edits.
  • Adjust brightness and contrast settings to bring out light pencil or ink text.

Best Practice: Test scan a sample page first to fine-tune brightness, contrast, and DPI settings before scanning an entire notebook.

4. Verifying Scanned Output: Ensuring Annotation Accuracy

Why It Matters:

  • Review each scanned notebook for missing handwritten notes or incomplete pages.
  • Compare digital and physical copies to confirm that annotations are fully retained.
  • Re-scan problematic pages with enhanced settings if any markings are unclear.

Best Practice: Implement a quality control process to verify that every annotation, marking, and handwritten entry is digitally captured.

Why Following Best Practices Ensures Research Integrity?

  • Retains all handwritten notes, annotations, and critical scientific markings.
  • Prevents scanning errors that could result in lost research insights.
  • Ensures compliance with research documentation and patent protection standards.
  • Improves long-term searchability and usability of digitized research records.

Next, we’ll explore the benefits of preserving annotations and markings in lab notebook scanning.

Benefits of Preserving Annotations and Markings

Why Is It Critical to Retain Handwritten Notes in Digitized Lab Notebooks? Annotations and markings in lab notebooks are more than just scribbles—they provide context, experimental adjustments, and intellectual property evidence. When labs invest in proper scanning techniques to preserve these details, they unlock significant advantages in research integrity, legal protection, and regulatory compliance.

Category Key Benefit
📜 Accurate Record Keeping: Ensuring Data Integrity Retaining handwritten notes ensures that scientific records remain complete and accurate for decades.
🔏 Intellectual Property Protection: Proving Research Ownership Proper annotation preservation strengthens intellectual property claims and patent applications.
⚖️ Regulatory Compliance: Meeting Documentation Standards Properly scanned annotations help labs meet compliance requirements and avoid legal complications.


Why Preserving Annotations and Markings Is Essential?

  • Ensures long-term data accuracy and research reproducibility.
  • Strengthens intellectual property and patent protection.
  • Meets global compliance standards for scientific documentation.
  • Enhances research efficiency and collaboration by retaining real-time notes.

Next, we’ll explore how to choose the right scanning service to ensure all annotations and markings are preserved.

How to Choose the Right Scanning Service for Annotation Preservation?

What Should You Look for in a Professional Lab Notebook Scanning Service? Not all scanning services are equipped to preserve annotations, handwritten notes, and marginal markings effectively. Choosing the right service ensures that every detail in your lab notebooks is accurately digitized, preventing data loss and compliance risks.

Here’s what to consider when selecting a professional scanning service for lab notebooks.

Key Factor Why It Matters Example What to Look For
📷 Professional Equipment: High-Resolution and AI-Powered Scanning ✅ Standard office scanners lack the precision needed for scientific notebooks.
✅ High-resolution (600–1200 DPI) imaging ensures every detail is captured.
✅ AI-powered handwriting recognition (OCR) enhances searchability of handwritten notes.
A pharmaceutical company working on drug stability testing selects a scanning service that offers 1200 DPI high-resolution imaging to capture fine-ink annotations in aging lab notebooks. 🔸 High-resolution scanning (minimum 600 DPI).
🔸 OCR technology with handwriting recognition.
🔸 Specialized lab notebook scanning equipment.
📚 Experience with Research Materials: Handling Scientific Notebooks with Care ✅ Lab notebooks contain delicate pages, historical records, and sensitive data.
✅ A professional service should understand how to handle aged, fragile, or complex scientific documents.
✅ Specialized scanning methods prevent page distortion, ink fading, and data loss.
A university research archive digitizing 50 years of environmental field notes chooses a scanning service experienced in preserving fragile documents, ensuring no margin notes or faded ink markings are lost. 🔸 Expertise in scanning research and laboratory materials.
🔸 Safe handling techniques for fragile or aged lab notebooks.
🔸 Experience with regulatory and archival compliance.
⚙️ Custom Solutions: Tailored Scanning for Lab Notebook Needs ✅ Every lab has different needs—some require full-color scanning, while others prioritize OCR indexing.
✅ Custom settings like contrast enhancement, multi-spectral imaging, and edge detection help capture marginal annotations and scientific symbols.
✅ The service should offer metadata tagging for easy retrieval of experiments, researchers, and dates.
A genetics lab scanning DNA sequencing notebooks works with a scanning service that offers custom contrast adjustments, ensuring even light pencil annotations remain visible in the final digital archive. 🔸 Custom scanning settings (grayscale, contrast adjustment, edge detection).
🔸 Metadata tagging for searchability.
🔸 Full-page capture to prevent margin cropping.


Why Choosing the Right Scanning Service Matters?

  • Ensures accurate retention of handwritten notes and annotations.
  • Prevents loss of intellectual property and critical research insights.
  • Meets compliance standards for regulated industries.
  • Improves long-term accessibility and searchability of digitized records.

Next, we’ll conclude with how our solutions can help preserve your lab notebook annotations and markings.

How Can We Help?

Is Your Lab Notebook Scanning Process Preserving Every Critical Detail? Accurate preservation of handwritten annotations, margin notes, and scientific markings is essential for research integrity, intellectual property protection, and regulatory compliance. Without the right scanning approach, your lab’s critical insights could be lost forever.

We specialize in high-resolution, AI-powered scanning solutions designed to retain every detail in your lab notebooks—ensuring that your research remains searchable, compliant, and legally protected.

Why Choose Us for Your Lab Notebook Scanning?

  1. Precision Scanning with High-Resolution Imaging (600–1200 DPI)
  2. Captures even light ink, pencil markings, and scientific symbols without distortion.
  3. AI-Powered OCR for Handwritten Notes & Scientific Annotations
  4. Converts handwritten text, calculations, and formulas into searchable data.
  5. Custom Scanning Solutions for Research Labs & Archives
  6. Grayscale enhancement, multi-spectral scanning, and edge detection ensure every annotation is retained.
  7. Regulatory Compliance & Data Integrity Assurance
  8. Meets FDA (21 CFR Part 11), GLP, and ISO standards for legal and research documentation.
  9. Safe Handling of Fragile, Historical, and Specialized Research Materials
  10. Expertise in preserving aged lab notebooks without ink loss or page distortion.

Let’s Future-Proof Your Lab Records with eRecordsUSA

  • Ensure every handwritten note, annotation, and research insight is preserved with precision.
  • Make your scanned lab notebooks fully searchable, compliant, and accessible anytime, anywhere.

Get in touch with us today—your partner in secure, high-fidelity lab notebook digitization!

How to Digitize Photos, Family Memorabilia & Keepsakes [2025]

How to Digitize Photos, Family Memorabilia & Keepsakes [2025]

What happens to your treasured family photos if they start fading? Have you thought how fragile handwritten letters might become in another decade? These questions resonate with anyone who wants to preserve their history. Worry not….

Digitizing memorabilia is the solution. It’s more than just scanning photos. It’s about preserving a legacy, ensuring that your memories don’t succumb to time, accidents, or loss. Imagine future generations exploring these keepsakes effortlessly through digital files, unlocking stories that might be forgotten otherwise.

photos and memorabilia scanning

Did You Know?

People print only 2% of the photos they take. Most images stay on devices, making digitization vital for sharing and preserving them. Digital preservation eliminates the album deterioration risks that may arise due to humidity, dust, natural disasters, or accidents.

Services like eRecordsUSA offer advanced digitization solutions, ensuring even delicate and outdated formats are safely converted into modern digital files. Now that you understand why digitization is important, let’s explore the items you can preserve. From photos to unique artifacts, the next section will guide you on what to prioritize for digitization.

What Types of Memorabilia Can Be Digitized?

Many types of memorabilia can be converted into durable, shareable digital formats. Let’s look at these:

Type of Memorabilia Examples Why It’s Important Digitization Benefits
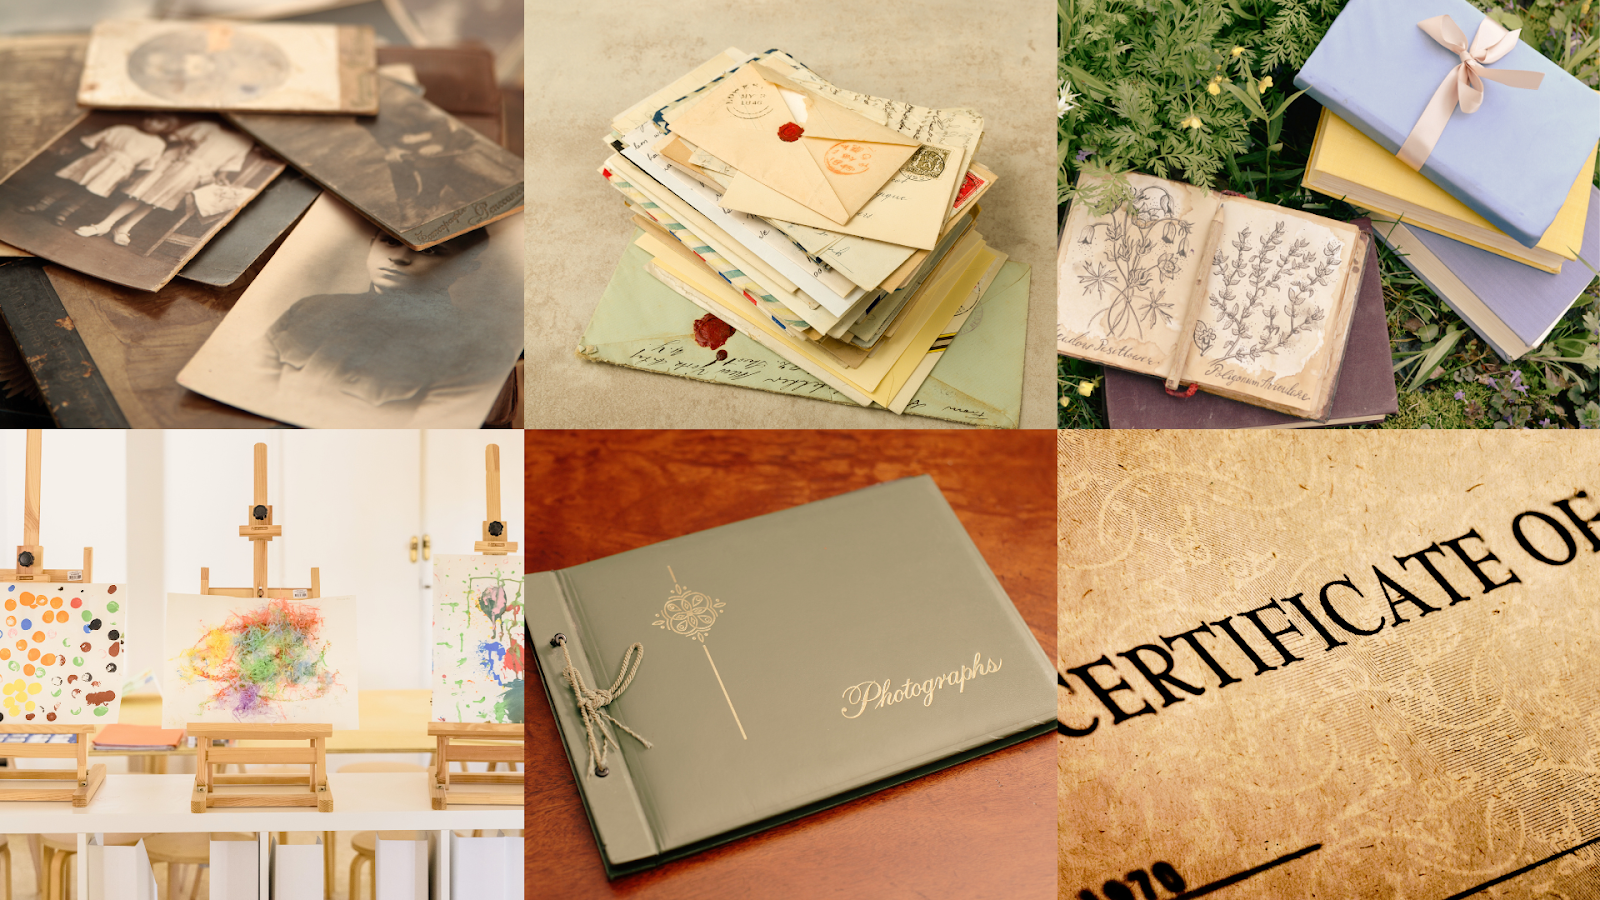
Photos and Photo Albums Old photographs, polaroids, printed albums, etc. Photos fade and degrade over time due to light and environmental factors. Long-lasting, high-resolution digital images; easy to share.
Videos and Film Reels VHS tapes, camcorder recordings, 8mm film reels Magnetic tape deteriorates after 10-20 years, and viewing requires outdated equipment. Converts to digital formats; compatible with modern devices.
Documents and Letters Handwritten notes, family records, certificates, and postcards Paper is fragile and vulnerable to moisture, pests, and aging. Permanent archives; searchable and organized digital files.
Scrapbooks and Journals Personal scrapbooks, diaries, children’s drawings, etc. Scrapbooks are bulky and prone to wear and tear; journals may have fading ink. Preserves creative and historical content while saving physical space.
Awards, Artwork, Certificates Certificates, degrees, trophies, children’s paintings, and more. Paper, paints, and materials deteriorate; physical items take up space. Preserves details in high resolution for future display or reference.
Heirlooms and 3D Objects Jewelry, medals, figurines These items can be lost, stolen, or damaged, and replicas may lose the original’s uniqueness. High-quality images or 3D scans create digital backups.

NOTE – All the types mentioned here are just for information purposes. At eRecordsUSA, We don’t digitize VHS tapes, camcorder recordings, or 8mm film reels and we also don’t provide 3D Scanning Services.

How eRecordsUSA Fits In?

  • Professional Expertise: We handle all formats, ensuring high-quality digitization for photos, videos, and fragile documents.
  • Cutting-Edge Tools: Our professional-grade equipment and expertise ensure every detail is preserved, creating high-quality digital files that last a lifetime.

Now that you know what documents can be digitized, it’s time to look at how to digitize these items effectively, the tools involved, and common challenges to avoid.

We’ll explore the practical steps for digitization and creative uses for your digital memories in the next section.

Tools, Challenges, and Creative Uses for Memorabilia Digitization

Digitizing memorabilia involves more than just having the right tools. While scanners and software can handle some tasks, challenges like handling fragile items, achieving professional-quality results, and managing time often require expert assistance.

scan photo albums and scrapbooks

Let’s explore them in detail:

1. Essential Tools for Digitization

Tool Purpose What to Know
Flatbed Scanners For photos, documents, and flat artwork. Produces high-resolution images, but scanning large albums or fragile items can be time-intensive.
Film/Slide Scanners For film negatives, 35mm slides, and reels. Requires precise calibration to avoid poor quality or misaligned images.
Video Conversion Devices For converting VHS tapes, camcorder recordings, and older video formats. Old tapes can degrade during conversion if mishandled; this requires specific knowledge for older formats.
Editing Software For enhancing, restoring, or retouching scanned images and videos. Advanced tools like Adobe Photoshop require expertise to avoid over- or under-editing.
Cloud Storage Platforms For securely storing digitized files. This offers easy access but requires careful file organization and redundancy to avoid confusion later.

Even with access to the tools listed above, challenges often arise during the document digitization process. Without professional expertise, these problems can result in wasted effort or even damage to your treasured items.

2. Challenges in DIY Digitization

  • Time and Effort: Scanning hundreds of photos or editing videos is tedious and can take hours or even days without proper equipment and workflows.
  • Handling Fragile Photo albums & other Items: Old photos, documents, and film reels can tear, crumble, or degrade while handling without special care.
  • Low-Quality Outputs: Consumer-grade scanners and conversion devices may produce pixelated or blurry photo results, especially for vintage photo formats.
  • Disorganized Archives: Without a proper strategy for naming and organizing files, your digital collection can quickly become chaotic.
  • File Compatibility Issues: Older formats, such as Betamax tapes or TIFF files, may require specialized tools to convert into modern, shareable image formats.

However, hiring professionals photo scanning services like eRecordsUSA helps eliminate these challenges, ensuring your memorabilia is handled with care and converted into high-quality digital files.

  1. Advanced Equipment: Professional-grade tools produce higher resolution and more accurate results than consumer devices.
  2. Expert Handling: Professionals are trained to safely handle fragile or outdated materials by avoiding damage or loss.
  3. Time Efficiency: Letting experts handle the work saves you hours of effort, allowing you to focus on enjoying the results.
  4. Creative Support: Services often include file organization, album creation, and project customization for meaningful outputs.

Once your memorabilia is digitized, you can explore several creative ways to relive and share your memories.

3. Creative Uses for Digitized Memories

  • Digital Photo Albums: Create themed collections for family events or milestones.
  • Personalized Gifts: Turn old photos into calendars, framed prints, or custom photobooks.
  • Event Slideshows: Compile videos and photos into a presentation for reunions, weddings, or anniversaries.
  • Online Family Tree: Add scanned photos and documents to genealogy platforms to preserve your history. Professional genealogy scanning ensures your family records are digitized with precision
  • Social Media Sharing: Share treasured memories with friends and family through private groups or social platforms.

Next, we’ll show you how to safely store and organize your digital files for the long term.

Organizing and Securing Digital Archives

Digitizing your memorabilia is only half the journey. Proper organization and secure storage ensure your digital files remain accessible and safe for years to come.

  • Start by creating a folder structure based on categories such as type (photos, videos, documents), event (weddings, birthdays, holidays), or year (1990s, 2000s).
  • Use descriptive file names like 1992_Family_Reunion_Photo1.jpg instead of generic ones like IMG_001.jpg to make searches intuitive.
  • Adding metadata, such as names, dates, and locations, can further enhance searchability and context.

To secure your files, follow the 3-2-1 Rule:

  • Keep three copies of your files, store them on two different storage mediums (such as cloud and external drives), and ensure one copy is offsite for extra safety.
  • Platforms like Google Drive, Dropbox, or OneDrive are ideal for cloud backups, while encryption tools and strong passwords provide additional protection for sensitive files.

For added convenience, professional services can automate organization, set up encrypted backups, and even recover damaged or lost data. A well-organized and secure archive ensures your memories are protected while remaining easy to enjoy and share.

Once your digital archives are well-organized and securely stored, you’ve taken a significant step toward preserving your memories. But the journey doesn’t end here.

As technology advances, new tools and techniques are emerging making it even easier—and more exciting—to protect and interact with your memorabilia.

So, what are you waiting for??? Get Ready to start…

At eRecordsUSA, we specialize in professional photo scanning & digitization services designed to protect your most cherished memories. Whether you need high-resolution scanning, image digitization, or secure storage solutions, our team ensures every detail is handled with care.

Don’t wait until it’s too late — contact us today to begin preserving your legacy for future generations.

FAQs

Q. Can I digitize old photo negatives without a scanner?

  • Yes, you can digitize negatives & slides using a high-resolution camera and a lightbox. Photograph the negatives and invert the colors using editing software. However, for high-quality results, professional slide & negative scanning services with dedicated film scanners are recommended. Contact us for more information.

Q. How long does memorabilia digitization take?

  • The time required depends on the quantity and type of items. Scanning photos or documents can take minutes per item, while video conversion may require hours per tape. For bulk digitization, professional services like us typically provide a timeline based on project size.

Q. What file formats are best for preserving digitized memorabilia?

  • For images, use JPEG for general use and TIFF for archival-quality storage.
  • Documents are best stored as PDFs for readability.

Choose image formats that balance quality and accessibility.

Q. Is it safe to mail my memorabilia for digitization?

  • Yes, reputable photo digitization services offer secure handling and tracking for mailed items. Use waterproof, padded packaging and insure the shipment for added protection. Our document scanning & digitization company prioritizes the safety of your items at every step of the process.

Q. Can I digitize oversized memorabilia like posters or blueprints?

  • Yes, oversized items can be digitized using large-format scanners. Professional large format scanning services ensure every detail is preserved without compromising quality, making them ideal for posters, blueprints, and other large documents.

Q. What are the environmental benefits of digitizing memorabilia?

  • Digitizing reduces the need for physical storage, cutting down on paper, plastic, and other materials. Digital files also reduce the risk of waste from damaged or deteriorating items, making it an eco-friendly preservation method.

Q. How can I involve family members in organizing digitized memorabilia?

  • Share files via cloud platforms like Google Drive or create collaborative albums using tools like Dropbox. Family members can add names, dates, or descriptions, enriching the archive while fostering collaboration.

Q. Are there apps that help with organizing digitized memorabilia?

  • Yes, apps like Mylio or Google Photos assist with organizing and tagging files. These apps use AI to group items by people, locations, or events, making your digital archive searchable and user-friendly.
Digitizing Blueprints: Modern Solutions for Architects & Engineers

Digitizing Blueprints: Modern Solutions for Architects & Engineers

Have you ever unrolled an old blueprint, and find it torn, faded, or impossible to share with your team?

As an architect or engineer, these physical documents can feel like a burden, slowing your ability to collaborate or adapt to changes. It’s frustrating when your work is held back by something as simple as outdated paper. The good news? Digitizing blueprints can remove these roadblocks—preserving your plans, improving accessibility, and giving you control.

blueprint scanning solutions for architects and engineers

Let’s explore how this modern solution works and why it’s becoming essential for architects and engineers. But before that, let’s understand what exactly Blueprint scanning & digitization is.

Understanding Blueprint Digitization in Architecture and Engineering

Blueprint digitization involves converting physical blueprints and technical drawings into digital formats. These formats—whether PDFs, TIFFs, or CAD-compatible files—allow architects and engineers to store, access, and modify documents efficiently.

Now, You’re familiar with the latest technology. However, you may wonder how it is useful in the engineering and architecture field. Am I right???

Scroll to learn some amazing blueprint scanning benefits for engineers and architects.

large format scanning & blueprint scanning service

Benefits of Digitizing Blueprints for Architects and Engineers

For architects and engineers, digitizing blueprints is more than just converting paper into a digital format; it’s about enhancing the precision of your work. Digital tools allow for zooming in on technical details and making adjustments without risking misinterpretation.

Sharing becomes instantaneous, whether working with contractors or collaborating with teams remotely. Storing blueprints digitally also means you avoid the hassle of physical storage and can retrieve files instantly from cloud repositories, improving project timelines and decision-making efficiency. Plus, digital blueprints safeguard against disasters like fires or floods, ensuring vital documents remain intact.

You also reduce office clutter by scanning and archiving the blueprints making your workspace more organized and productive. Finally, digitization of blueprints helps meet compliance requirements by streamlining document retention policies and ensuring easy, secure access to your files.

After exploring the benefits of Blueprint digitization, let’s dive into the modern technologies that allow us to complete this task.

Did you know that by 2025, 49% of the world’s stored data will reside in public cloud environments?

It reflects the increasing reliance on digital storage solutions for large datasets, including digitized blueprints.

scan to cad & blueprint scanner systems

Modern Technologies for Digital Blueprint Conversion

Digitizing blueprints today involves several cutting-edge tools.

  • Large format blueprint scanners capture every line of your designs with high resolution.
  • The annotations and measurements on blueprints become searchable, streamlining data retrieval with Optical Character Recognition (OCR).
  • Cloud-based platforms allow these files to be stored and accessed from anywhere, facilitating multi-user collaboration.
  • Building Information Modeling (BIM) adds further depth by enabling architects to turn 2D designs into interactive 3D models for better visualization.
  • Finally, 3D scanning converts real-world spaces into digital models, ensuring engineers work with accurate data.

Wondering, which technology best suits your needs or lacks access to these tools???

Don’t worry…. eRecordsUSA offers comprehensive blueprint scanning & digitizing services, ensuring you get the most reliable and tailored solutions for your projects.

Now, let’s look at the complete process of digitizing blueprints.

scanning & digitization of construction files building permits drawings plans certificates

Step-by-Step Guide to Converting Paper Blueprints to Digital Formats

Digitizing blueprints is a precise process that requires careful planning and execution. Here’s a step-by-step guide to help you through:

  1. Prepare the Documents: Ensure your physical blueprints are clean, flat, and in good condition for scanning. Damaged or folded blueprints may affect the quality of the scan.
  2. Choose the Right Scanning Method: Use a large-format scanner to capture detailed designs. For older blueprints with text, OCR can make the text searchable for easy reference.
  3. Convert to Desired Formats: Once scanned, convert the files into appropriate digital formats—PDF for easy sharing, TIFF for high-quality archival, or CAD-compatible formats for further editing.
  4. Organize and Store: Store the digitized blueprints in cloud storage for easy access and backup. Ensure you create a logical naming system for quick retrieval.
  5. Integrate with Tools: For larger projects, integrate the digitized files into BIM or other CAD software for further design manipulation and collaboration.

This process ensures that architects and engineers can efficiently digitize and organize their blueprints while maintaining the quality and accessibility of their designs.

Need help with any step? eRecordsUSA offers end-to-end blueprint scanning, ensuring every aspect of your project is handled with care.

Common Mistakes to Avoid in Blueprint Digitization

While digitizing blueprints offers many advantages, avoiding these common mistakes is essential for architects and engineers:

  1. Low-Resolution Scanning: Ensure you scan at a high resolution to capture detailed measurements and annotations.
  2. Inconsistent File Naming: Create a consistent naming system for easy retrieval.
  3. Lack of Backup: Always store your files in multiple locations, including cloud backups.
  4. Ignoring File Format Compatibility: Ensure the files are saved in formats compatible with CAD or BIM software to avoid conversion issues.

Avoiding these mistakes ensures the quality and accessibility of your digital blueprints.

Outsourcing vs. DIY: Choosing the Best Approach for Blueprint Digitization

When it comes to digitizing blueprints, you have two main options: outsourcing the task to professionals or handling it in-house. Outsourcing is ideal if you need high-quality scans done quickly and don’t want to invest in expensive equipment like large-format scanners.

Professional document scanning & digitization services also offer advanced features like OCR and cloud storage integration.

On the other hand, DIY digitization works for smaller firms that need ongoing scanning and can invest in the necessary equipment. However, managing the process in-house requires time, training, and maintenance.

Legal Compliance and Data Security in Digital Blueprint Management

Blueprint digitization is not only about convenience—it also plays a vital role in maintaining compliance with industry regulations.

Architects and engineers handle sensitive information, and digital storage offers robust security measures like encryption, controlled access, and audit trails, ensuring compliance with laws such as HIPAA, GDPR, and other regional data protection standards.

Furthermore, digital files allow easier tracking and secure sharing, ensuring that only authorized personnel access important blueprints, reducing the risk of data breaches. In addition to securing sensitive information, digitization also aligns with sustainability efforts. As we enhance security, let’s explore how going digital reduces our environmental impact.

Environmental Impact of Transitioning to Digital Blueprints

Traditional blueprint printing consumes vast amounts of paper and ink, contributing to deforestation and pollution. By going digital, architects and engineers can decrease their reliance on paper, lowering their carbon footprint and supporting sustainability initiatives.

Additionally, digital blueprints eliminate the need for reprints, further conserving resources and helping companies meet their green business goals.

Final Words

In a nutshell, blueprint digitization simplifies workflows, boosts collaboration, and secures your valuable documents, all while contributing to sustainability efforts. By embracing modern technologies, architects and engineers can future-proof their projects, ensuring efficiency and protection in an increasingly digital world. Ready to take the next step? Explore professional digitization services with eRecordsUSA to streamline your processes and safeguard your blueprints today.

Transform Your Blueprint Workflow with eRecordsUSA

Ready to take your architectural and engineering projects to the next level?

At eRecordsUSA, we specialize in providing cutting-edge blueprint digitization services that empower professionals like you to embrace the modern era of design and collaboration.

📐 Why Choose eRecordsUSA for Blueprint Scanning & Digitization?

  • Unmatched Precision: We utilize advanced scanning technology to capture every detail of your blueprints with impeccable accuracy.
  • Enhanced Accessibility: Transform your physical blueprints into easy-to-share, searchable digital files.
  • Secure Storage Solutions: Safeguard your critical designs with our reliable and secure digital archiving services.
  • Environmentally Friendly: Eliminate the need for bulky physical storage and reduce your ecological footprint.

📞 Let’s Get Started!

Partner with us to streamline your blueprint management and boost productivity.

Contact eRecordsUSA today to learn more about our services or to request a customized quote. Digitize your blueprints and design the future with confidence.


People Also Ask

What is the Cost of Blueprint Digitization Services?

  • The cost of digitizing blueprints depends on the number of documents, their size, and specific requirements like OCR or CAD compatibility. Professional services like us offer customized pricing for accurate estimates.

How Can Digitized Blueprints Improve Project Timelines?

  • Digital blueprints streamline collaboration by enabling instant sharing, fast retrieval, and integration with design tools, reducing delays in communication and decision-making.

What File Formats Are Best for Blueprint Digitization?

  • The best formats include PDF for sharing, TIFF for archival quality, and CAD-compatible formats for editing in design software.

Can Old or Damaged Blueprints Be Digitized?

  • Yes, damaged blueprints can be digitized, though preparation like flattening or repairing tears is often necessary. Advanced document scanning equipment ensures maximum quality preservation.

Is Blueprint Digitization Environmentally Friendly?

  • Yes, going digital reduces paper and ink use, lessens deforestation and pollution, and aligns with sustainability goals by eliminating the need for reprints.

How Secure Are Digitized Blueprints in the Cloud?

  • Cloud storage providers implement encryption, role-based access, and regular audits to secure sensitive data. Opt for reputable platforms to ensure compliance with regulations.

What Are the Compliance Considerations for Blueprint Digitization?

  • Compliance involves adhering to data protection laws like GDPR or HIPAA, ensuring secure access controls, encrypted storage, and audit trails for sensitive project files.

How Can Digitized Blueprints Integrate With CAD Software?

  • Once converted to CAD-compatible formats, digitized blueprints can be edited, annotated, or expanded upon using design tools like AutoCAD or Revit.

What Are the Limitations of DIY Blueprint Digitization?

  • DIY digitization may lack precision, advanced features like OCR, or proper storage solutions. It requires significant time, training, and investment in equipment.

How Do Large-format Scanners Enhance Blueprint Digitization?

  • Large-format scanners ensure high-resolution captures, preserving intricate design details, while supporting annotations, OCR, and format compatibility for engineering needs.
Best Practices to Organize & Digitize Old Family Photo Albums

Best Practices to Organize & Digitize Old Family Photo Albums

Looking at an old family photo often feels like stepping back in time. Each image captures a piece of history, but pictures are fragile. Sunlight, dust, and time can fade and damage these precious memories.

That’s why digitizing old photos is so important. Once they’re scanned, we’re not just preserving these photos—we’re securing a lasting piece of our family heritage. And the best part? Digital copies protect these images from further wear and tear, keeping them safe for generations.

Did you know that The COVID-19 pandemic significantly increased demand for photo digitization as people sought to preserve memories during isolation, with interest surpassing pre-pandemic levels? Source

scanning old family photos - best practices

With the right equipment and practical techniques, we can create a digital archive that preserves image quality and sentimental value.

Let’s start with the basics: choosing the best scanner for the job.

Understanding Different Types of Scanners for Photo Digitization

Choosing the right scanner to improve image quality in photo digitization makes a huge difference.

Not all scanners are created equal, especially for capturing the fine details in old photos.

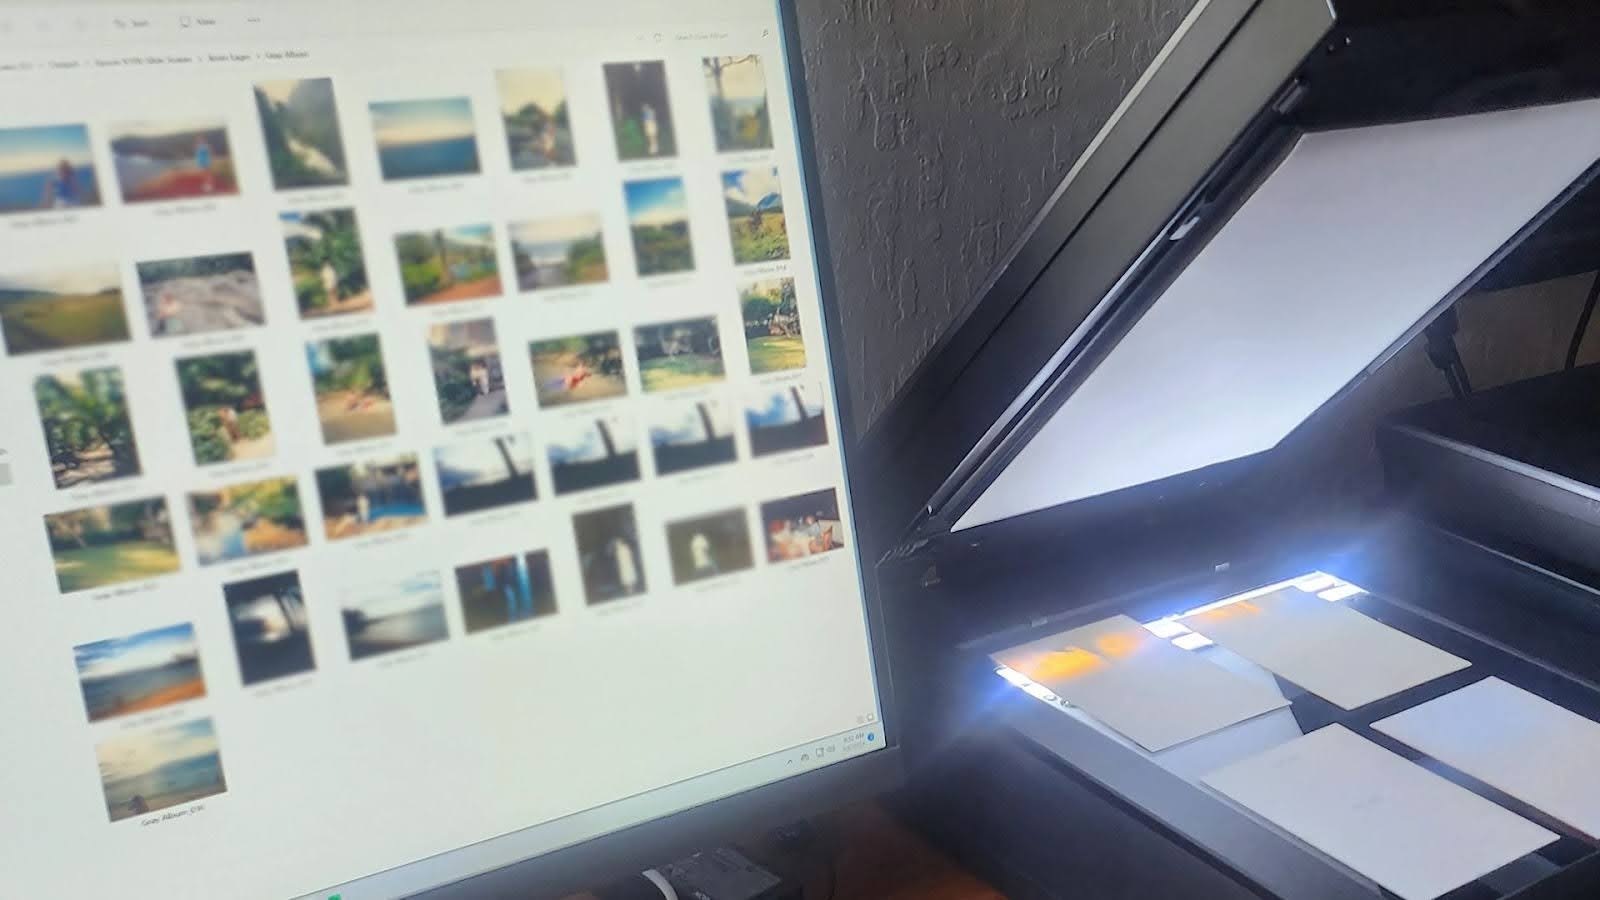
  • The flatbed scanner is a popular choice for photo scanning because it’s versatile, affordable, and can handle images of various sizes without damaging them.
  • Since flatbed scanners don’t pull photos through rollers, they’re also safer for delicate and aging materials.
  • If you’re working with film or slides, a dedicated film scanner is ideal, as it’s designed to capture high-resolution details and texture.

A flatbed scanner ideal for digitizing old family photos

Another big factor is the scanner’s DPI, or “dots per inch,” which determines the image resolution.

A DPI of 300-600 captures sufficient detail without creating large files.

However, if you’re planning to print large copies of the photos, consider using a higher DPI for extra clarity. Some scanners even come with specialized software and color restoration settings, making it easier to recover faded colors and enhance contrast.

By choosing the right scanner and settings, you’ll be already on your way to building a solid digital archive.

Next, let’s talk about the preparation of those photos before scanning.

How to Organize Photos Before Scanning?

Before diving into the scanning process, it’s a good idea to get organized. Sorting your photos can save time later and make it easier to find specific images in your digital archive.

  • Start by grouping photos by categories that make sense to you—maybe by date, event, or even by the people in them.
  • If you want to ensure your photos are stored safely while you organize, archival materials like acid-free folders and boxes can be a big help; they protect photos and keep everything in order.

Once you have your categories, try labeling each group or photo.

A simple sticky note or an archival pen for non-destructive labeling can go a long way. If you’re looking for a professional touch, eRecordsUSA can help organize, digitize, and securely store your photos and documents, ensuring they’re well-preserved and easy to access.

With your photos organized and ready, it’s time to prepare them for scanning by giving them a bit of gentle cleaning and handling care.

Handling and Cleaning Photos for Scanning Preparation

With everything organized, let’s talk about handling and cleaning those precious photos before scanning.

Old photos can be surprisingly delicate, and even a simple fingerprint can lead to long-term damage. That’s why wearing lint-free gloves is a smart way to keep oils and smudges off the surface.

Dust particles are common in older photos, and removing them can make a noticeable difference in scan quality.

  • A soft, anti-static brush or air blower works great for lifting dust without scratching the surface.
  • If there is a stubborn spot, use a microfiber cloth gently without harsh chemicals.

Cleaning Dust Off Photos

The goal is to give the scanner a clean, clear surface to capture every detail.

Ensure your digital images are sharp and true to the original by carefully preparing photos before scanning. Once prepped, use optimal scanning settings to capture high-quality photos.

Best Practices for Scanning Photos in High Quality

Follow these steps to achieve sharp, high-quality photo scans:

  • Enable sharpening, contrast boost, or color balancing to improve clarity and reduce the need for post-editing.
  • Save photos as TIFF for archival quality without compression or as high-resolution JPEG for everyday use.
  • Use the multi-pass option to enhance color depth and sharpness, especially for faded photos.
  • Place a solid, neutral-colored sheet behind photos to reduce distractions and simplify cropping.
  • Use the preview function to check brightness and exposure, ensuring scans reflect the original photo’s appearance.
  • Place the scanner on a stable, flat surface to avoid vibrations that reduce image clarity.
  • Maintain color accuracy by calibrating the scanner, especially for vintage photos with fading colors.
  • If built-in scanner software lacks features, tools like VueScan or SilverFast provide better color and image quality.
  • Cover the scanner when not used to keep the glass dust-free, ensuring optimal scan quality.

Adopting these practices ensures clear, high-quality scans that are ready for digitization.

If overwhelmed with these photo scanning practices, consider consulting a professional photo scanning service like eRecordsUSA. We offer expert photo scanning, digitization, and organization for preserving memories with precision.

Now learn how to save and store these pictures securely.

Saving and Compressing Scanned Photos Without Quality Loss

It’s essential to save your photos carefully after converting them into soft copies to maintain quality over time.

  • Create multiple backups of your edited images, ideally on an external hard drive and a cloud storage service. This way, even if one storage option fails, you’ll have a more secure copy.
  • For quick access and organization, label files with specific details, like dates, locations, or names. Organizing your files now will make it easier to find images later and keep your digital archive neat and accessible.

With your photos safely stored and organized, you are all set to cherish your lovely moments anytime, anywhere!!!

Conclusion

We hope you feel empowered to preserve those irreplaceable pieces of family heritage. Digitizing old photos protects your family legacy, turning fragile images into a secure digital archive for generations to enjoy.

If you’re looking for expert help with archival quality, image enhancement, or digital preservation, feel free to contact us. We offer specialized photo scanning and digitization services by using professional photo scanning equipment. Entrust your memories to eRecordsUSA, where every detail is handled with care and precision.

FAQs

What types of photos can eRecordsUSA digitize?

We can digitize a wide range of photos, including prints, albums,  slide and negatives scanning. Our process is designed to handle delicate and aging photos with care.

How does the photo digitization process work?

Our team carefully scans each photo using high-quality flatbed scanners to capture every detail. We ensure proper handling, cleaning, and organization for a seamless digitization experience.

Can you handle large volumes of photos for digitization?

Yes, we specialize in bulk photo digitization. Whether you have a few albums or thousands of photos, our process ensures each image is preserved with the highest quality.

What resolution do you use for scanning photos?

We typically scan photos at 300-600 DPI for excellent clarity. For archival purposes or larger prints, we offer higher resolution.

Can I organize my photos before sending them for digitization?

Absolutely! Organizing your photos by events, dates, or categories will help streamline the process. If needed, our team can assist with organizing them for you.

What formats will my digitized photos be saved in?

We provide digitized photos in high-resolution formats such as JPEG or TIFF based on your preferences. These formats ensure quality preservation and easy accessibility.

Why should I choose eRecordsUSA for my photo digitization needs?

With years of experience, professional equipment, and a team dedicated to preserving memories, eRecordsUSA ensures a hassle-free and high-quality digitization experience.

How can I get started with eRecordsUSA’s photo digitization services?

It’s easy! Simply contact us via our website or Call us at (510) 900-8800 to discuss your project. Our team will guide you through the process and provide a customized quote based on your needs.